Saturday, May 2, 2015

Kentucky Derby Day

A good friend is attending the 141st annual Kentucky Derby today and I was asked to make small memorable gifts for her to bring to friends attending as well.  After much thought and research, we decided on these adorable floating charm lockets.


Each contains 8 charms: A silver rose, an umbrella (or parasol), a silver horse, the numbers 141, a jockey riding a derby horse, and a silver horseshoe.  Large clasps for easier use are on 20-24" silver plated chains.


I wanted a small but unique presentation gift box to put each locket in.  I found this amazing tutorial on a bag-in-a-box from Sam at http://pootles.co.uk


I used beautiful double sided papers with garden images to create each gift box.  White lace, silver trim and a paper red glittery rose finished each one.


Each finished bag in a box was approximately 2.25" wide by 3.5" tall and held the locket charm necklace perfectly.


Supplies used: 
  • For jewelry: Origami Owl (or similar brand) floating charms, lockets and silver hypoallergenic chains.
  • For gift boxes: Garden paper pix 12x12" paper pad by Paper House, Red glitter card stock, Spellbinders Blossom One die, 1/8" silver wired ribbon, white 1.5" lace, butterfly paper punch, We R Memory Keepers envelope punch board.

Monday, April 27, 2015

Sparkle for Mom

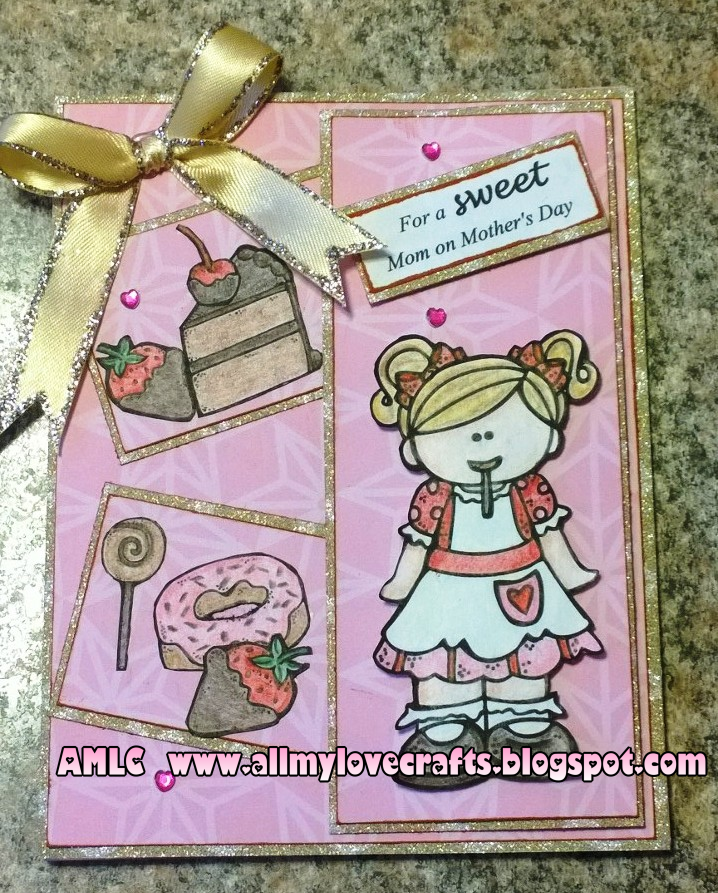
Newest challenge on Melonheadz blog is: Add Sparkle! This includes glitter, gems, bling, etc. Mother's day is coming up soon on May 10th this year, so this was my theme.  I layered each element with fun glitter paper and used gold Stickles to outline the handmade bow!


Love adding a small touch to the inside!  Did you post a card for mom? Leave your link in the comments so I can visit! :)


Supplies used:
  • Melonheadz digital bundle "Death by Chocolate"
  • Prismacolor Pencils
  • Glam Glitter paper pad by The Paper Studio
  • Sweet Soiree paper pad by Craft Smith
  • Satin ribbon outlined with Gold Stickles
  • Heart gem embellishments
  • Zig 2 way glue pen and Elmer's permanent tape runner


Tuesday, April 21, 2015

Something yummy!

This fortnight's challenge at Creative Craft Cottage is: Something yummy to eat or drink!  I love the teapot shaped cards at the Cutting Cafe.  I don't own an expensive cutting machine, so this was all cut by hand. (With the help of a craft knife for inside the teapot handle)

  
Cutting out this piece was not as difficult as I first thought it would be. It was actually quite relaxing to fussy-cut this project while listening to music.

Supplies used include:

Friday, April 17, 2015

Makeup Party Invitations!

These were made for a Beauticontrol consultant who is having a makeup party next month.

 
These next few pictures are of the inside right, inside left and back of the cards.  Right says "It's a Beauticontrol Party". The left is a quote which I love! 


"For beautiful EYES, look for the good in others; for beautiful LIPS, speak only words of kindness; and for POISE, walk with the knowledge that you are never alone." ~ Audrey Hepburn


This image was stamped with Staz On Jet Black Ink and watercolored using Distress Ink pads/markers.  I really enjoyed this project!

As a little bonus, I created a small gift set of 5 greeting cards in a box to be given away to those that attend the party.  I used my circle punch and new Lawn Fawn Stamp Set to create a small game that can be used over and over to choose a winner.

Monday, April 13, 2015

Using 2 or More Designer Papers

New challenge today at Melonheadz Friends: Use 2 or more designer papers!  I enjoyed this theme because it made me reach for cute, new papers I hadn't used yet! (ok, yes...hoarding them...)


The quote says "A cup of tea warms the soul like a good friend."  This is one of the gorgeous double-sided papers in the Botanical Tea paper pad by Graphic 45. The peach polka dots paper is from Heidi Swapp and the roses are in Melonheadz Floral Combo Pack. (link below)


I used Glossy Accents on the blue butterfly to make it pop, as well as some self adhesive blue pearls from Orientaltrading.com


Love putting a small scrap of paper on the inside to tie the whole card together!


Supplies used:
  • Melonheadz digital bundle "Cassie's Floral Combo Pack"
  • Graphic 45 Botanical Tea Paper Pad
  • Heidi Swapp "September Skies" Paper Pad
  • Tim Holtz Distress Ink in Weathered Wood
  • Ranger Glossy Accents
  • Self adhesive pearls from OrientalTrading.com
  • Elmer's permanent tape runner 
This card was entered into the following challenges: Craftyhazelnut's Patterned Paper Challenge.  April 5/1

Tuesday, April 7, 2015

Die Cuts Challenge

This fortnight at Creative Craft Cottage is challenge #37 - Use Die Cuts!  I decided to use my favorite die set, Spellbinders Butterflies Two, and create 2 different card styles.  This first digital image is by Karleigh Sue.  Dies were used to cut through the paper as well as the foam sheet to create a butterfly-shaped "pocket" to hold sequins and glitter.  Love shaker cards! :)


I used the die cut butterflies to decorate the inside of the card.


For the 2nd card I used this adorable image from Lemon Shortbread.  I die cut a bunch of butterflies to create this faux embossed background with pink on pink card stock.  I love how the girl appears to have wings behind her!


**The A.M.L.C. watermark is not on the inside of the actual card.**
How are your spring projects coming along?  Feel free to share with me in the comments section. I would love to see them! :)

Supplies (and digital images) used include:
  • Lemon Shortbread image titled "Sweet Lolita Bouquet"
  • Karleigh Sue image titled "Hot Date"
  • Spellbinders Dies Butterflies 2
  • Spellbinders Dies Fancy Tags
  • Core'dinations card stock (Joann's)
  • Recollections card stock (Michaels')
  • Prismacolor Pencils
  • Patina Stickles
  • Elmer's tape runner & Zig 2-way glue pen
  • Foam sheets (Michaels')
  • Embellishments, sequins and nail glitter
  • Clear acrylic sheets from Orientaltrading.com 

Thursday, April 2, 2015

Pink and Orange Spring Card!

The newest Melonheadz challenge theme is...Spring! I fell in love with this orange and pink themed paper pack I found at Tuesday Morning.  Wanted to use my new mason jar die also, it's so cute!


Please feel free to join us for the challenge at Melonheadz! A melonheadz image is not required, so share your spring creations!  :)

Supplies used:
This card has been entered into the following challenges:  Craftyhazelnut's Patterned Paper April Challenge.  5/1/15

Thursday, March 26, 2015

More spring butterflies and cute mice!

Border Dies were the topic in day 6 of OnlineCardClasses.com.  As I'm a new paper crafting "addict", I have yet to purchase border dies.  I did, however, find one in a Spellbinder set called Damask Accents.  Following inspiration by Debby Hughes, I was able to create a beautiful background using this border die!


Granted it is not the exact same inlaid background technique she had used, but I wanted to work with what supplies I have. Plus I just received an order from Simon Says Stamp and my Misti is still on the way...can't scare my husband too much with all the boxes coming in lol!


Saved the small inner pieces of this border die to use as confetti. They looked like little flower petals to me! :)

Alphabet Dies were the topic of day 7.  I finally invested in a great font alphabet set by Lawn Fawn in polymer for stamping, so I honestly hadn't even thought of alphabet dies.  Kathy Racoosin inspired me with her beautiful technique of what she calls "hidden letters." Here is where my first script word die came into play!


It was gorgeous outside today, so at 10am I stamped this adorable House Mouse image and sat outside to watercolor it.  Basking in the sun helped dry the piece quickly as well!  Die cutting this word without loosing the small inner pieces was the challenge, but managed to pull this off. I still have a big smile on my face. This was a lot of work, but I adore the final product!


Supplies used: 
  • Spellbinders die set Damask Accents
  • House Mouse stamp "In the rain"
  • Core'dinations card stock (Joann's)
  • Recollections card stock (Michaels) 
  • Spellbinders die set Butterfly Two
  • Embellishments
  • Glossy Accents
  • Foam tape by Orientaltrading.com
  • Simply Art 36 Watercolors
  • Jet Black Staz On waterproof ink
  • Lawn Fawn Alphabet stamp set Harold's ABC's
  • Paper Smooches Thanks word 2 die
  • Distress Ink (Spun Sugar and Lilac)

Tuesday, March 24, 2015

The Cat's Meow and a Butterfly!

Day 4 is working with Mini Dies. I chose to try this technique by  Jennifer Rzasa to use mini dies as a background.  Only problem....I only have ONE mini die.  (and, of course, it's a kitty)  Needless to say this card took me a while to create, but I do love the final product!  Plus I got to play with my watercolor paper and distress inks again. The colors used are Mustard Seed, Bundled Sage and Salty Ocean to try and give a colorful ombre-like effect.


The sentiment used says "You're The Cat's Meow!"


Day 5 was about coordinating dies...unfortunately, I don't own any die/stamp sets. (Yet anyway lol!)   Shari Carroll used a die to create a beautiful window on the front of her card.  I wanted to mimic this technique using what I had and chose Butterfly Two dies by Spellbinders.  They have a pattern inside the die cut that can be embossed. I used this as a stencil instead to put Peacock Feathers Distress Ink in the center of the butterfly.  The pop up window is colored with Lilac ink and placed over the stenciled image using foam tape.


Supplies used for these projects:
  •  Spellbinders dies Butterfly Two
  • Core'dinations card stock
  • Embellishments
  • Lawn Fawn "On The Mend" stamp set for sentiment
  • Washi Tape
  • Foam tape from Orientaltrading.com
  • Staz On Jet Black Ink
  • Punnylicious Stamp Set by MyPinkStamper.com
  • Poppystamps.com Sitting Cat die
  • Gold Recollections Embossing Powder
 

Monday, March 23, 2015

Day 2 and 3 - Online Card Classes

I love Kristina Werner's lesson for day 2 of class. Using smaller die cuts inside a larger die! I had some pretty butterflies, leaves and flowers in mind. I first watercolored a 4x6 piece of watercolor paper using Distressed Inks.  Arranged those pieces inside a basic circle die and added a cute sentiment from a Lawn Fawn stamp set.


I am in love with the final look of this card!


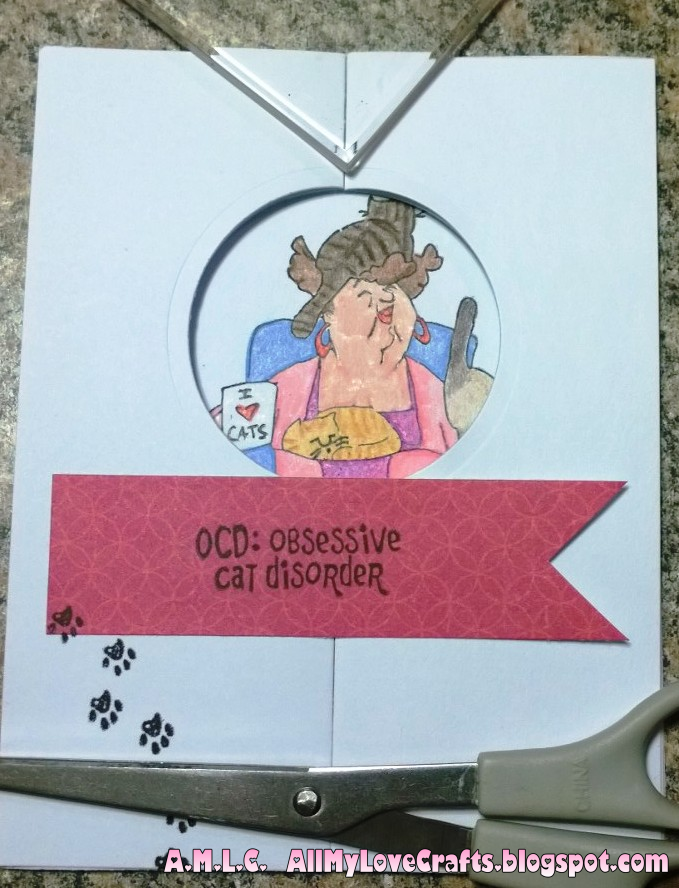
Day 3 was about using Basic Shape Dies. I loved Jennifer McGuire's fold-out window card! I'm a big cat lover, so decided to use my new stamp set and basic circle die.


Here is what the inside looks like.  After watching how Jennifer folded this card, it is actually very easy to repeat!! I was scared at first thinking it would've been quite difficult. The only difference for me, I did not use the measurements to score/fold. I simply folded the cardstock in half, and front panel in half again. My paper kept coming out uneven trying to use a score board lol!


Colored with Prismacolor Pencils.  Has anyone else learned something new from Online Card Classes?  I'm loving every lesson!! :)


Supplies used: 
  • Art Impressions stamp set SCO652
  • Master's Touch Water color paper
  • Distress Inks
  • Prismacolor pencils
  • Core'dinations Card Stock
  • Crate Paper 12x12 paper pad (Tuesday Morning)
  • Spellbinders Dies: Anemone Flower Topper, Damask Motifs, Butterflies Two
  • Lawn Fawn "On the mend" stamp set


Sunday, March 22, 2015

Another Online Card Class!

I'm taking the newest Online Card Class, Stretch Your Dies.  This is posting late since Day 1 of class was Monday...(oops!) but I plan on having all my class work done by Thursday. (that's the goal anyway lol!) This wonderful technique is by Debby Hughes.  I wanted a bit of a challenge and sure did get it with this one!


This is a one layer simple card, however, the word "thanks" is nestled between 2 pattern papers.  The tiny pieces in the center of the words were so tiny and hard to keep track of.  To fix this, I folded 2 dryer sheets (twice each) and stacked them together. After die cutting the sentiment, place the die (with paper still inside) on top of your folded dryer sheets and run through once. The pieces stick to the dryer sheets!! Love it!! :)

I hate to waste paper, so used the negative image and small pieces to create a second simple card.
 

Items used:
  • Core'dinations Card Stock (Joann's)
  • The Paper Studio "Harper's Boutique" paper pack
  • Zig two way glue pen
  • Paper Smooches Thanks Word 2 Die
  • Embellishments
  • Spellbinders Anemone Flower Topper die


Saturday, March 21, 2015

New favorite die!

This project was inspired by this gorgeous Image by The East Wind. Today is the start of a new challenge at Creative Craft Cottage with the theme being "3 of a kind." Feel free to visit and share your projects!


I fell in love with this new die from Spellbinders.  It's called spiral blossom one. I have had it in my stash but just pulled it out to play with it today. After rolling and hot gluing my first paper rose, I was hooked!  I'm new to paper flower creation, but with the help of this die, it was really easy.  Planning on adding these to a lot of my projects!


Items used for project:
  • Flat back pearl embellishments from Orientaltrading.com
  • Spellbinders Die "Spiral Blossom One"
  • Core'dinations 65lb Card Stock
  • Spellbinders Die "Damask Motifs"


Monday, March 16, 2015

Glittery Bunnies!

Starting today, March 16th, is the newest challenge at Melonheadz Friends.  Animals!!!  Those who know me realize that I adore animals of all sizes, my favorites being cats!  Since Easter is soon upon us however, I chose these cute bunnies for a spring-themed card.


The glitter-look on the rabbits was achieved using a thin layer of Stardust Stickles. Stickles are quickly becoming one of my favorite products for glitz and shine!  Plus they dry fairly quickly! (In my opinion anyway with a light layer.)  I also pulled out my Stampamajig for the first time to use with a set of alphabet blocks I've had stored away.  I'll admit it, had to go back to YouTube and re-watch the video on using it.  But with a little practice, and a ruler, it didn't turn out too bad!  Found out the letter "O" is not positioned on it's block straight and had to make a few adjustments. (As you can see!) The word "you" turned out perfect finally!


Items used for this project:
  • Woodland Creatures Combo Pack by Melonheadz
  • Stardust Stickles
  • Core'dinations Card stock from Joann's
  • Colorbox 6" Designer paper pad from Walmart
  • Gold Sharpie Permanent Marker
  • Worn Lipstick Distress Marker
  • Thin Teal Ribbon
  • Alphabet blocks
  • Stampamajig
  • Staz on Jet Black ink
  • Gold Stampabilities Ink 

Saturday, March 7, 2015

Not Quite Straight at Creative Craft Cottage

Not Quite Straight is the latest challenge theme


The sponsor for this fun challenge is Rick St. Dennis!  Please feel free to join us by adding your creation.  This challenge runs for 2 weeks (a fortnight) and the winner receives 2 digital images of their choice from the sponsor!

https://www.etsy.com/au/shop/RickStdennis

I decided to use spring colors and chose pink/purple/white. I just love this sentiment by TLC Creations. It went well with the image! As you can see, I'm quite glad the theme was "Not Quite Straight" since I could not line up the purple flower background I made with the pink outline border paper...so it was a happy mistake that fit!


If you have any recent "oops" cards that aren't quite straight, please join us! We would love to see them!  Keep the creativity flowing! :)

This card will be entered into the following challenges:
-Simon Says Stamp Wednesday Challenge:  Special Lady/Girly  3/12
Party Time Tuesdays- #196  4/7  (2 of 3E/month)

Items used include:


Friday, March 6, 2015

Spring Coffee (and Tea!) Lovers Bloghop - Last One!

I can't believe I didn't create a tea card...so here's one I made fresh today to fit in at the last minute! This will be entered into the Spring Coffee Lovers Bloghop.  It ends tonight... can't wait to see the winners! Tea and cocoa count as well, and I enjoy all three!  Mornings are coffee but some evenings I crave a hot spicy chai tea latte....yummm!


I created this card to be included in an online Etsy Easter Egg Hunt! My donated prize is a gift box with 4 custom handmade cards (including this one!) with envelopes and matching confetti. 


Details are not listed yet about the hunt, but don't worry, I will let you know all about it and how to enter to win within the next week or 2!  It will run from March 23rd--March 27th. It is sponsored by Out Of The Box Sampler (OOTBS) and there are many goodies to win this year...subscribe to my posts to stay tuned!

This card will be entered into the following challenges:
-Simon Says Stamp Monday Challenge: A Hint of Clover  3/9 
Supplies used include:
  • Fiskars "Latte Love" Stamp set (one of the first I purchased and my favorite!)
  • Staz On Jet Black Ink
  • Embellishments given as a gift
  • Core'dinations 65lb cardstock


Spring Coffee Lovers Bloghop - Card #3

I wanted to create today's card using up some scraps of patterned paper I had in my scrap box.  This card will be entered into the Spring Coffee Lovers Bloghop.


These scraps are from a 6x6" designer paper pack I found at Walmart. (not heavy duty paper, but $3.00 for 100 sheets! Not kidding!)  Thought these colors were very spring-like along with the chartreuse colored mug!

This card will be entered into these challenges:
-Simon Says Stamp Monday Challenge - A Hint of Clover  3/9
-Through the craft room door - march 3-9   3/11 (2 of 2E)
-Crafting from the Heart - #49 3/10 (3 of 3E)
CraftyHazelnut's Patterned Paper Challenge - March

Wednesday, March 4, 2015

Spring Coffee Lovers Bloghop - Card #2

Print
This is the second card I have created for this blog hop!  Here is my first spring coffee creation.  Really wish I had found this site when it started.  I love coffee/tea/cocoa and cardmaking! :)  Click here to join in!


I decided to use a color I do not reach for very often...yellow!  (I'm a pink/purple/greens/blues fan.)  The printed paper is from a Colorbox 6x6" 100-sheet designer paper pad I found at Walmart for $3.00! The latte sleeves are paper pieced from the same pad. I used Fiskars Latte Love stamp set, gold Stickles, foam tape to pop pieces up and an adorable butterfly paper punch.


 We are supposed to get bad weather tonight, so I rescued some daffodils before the leaves get torn from the heavy rain.  Hope this brightens your day!

I will be entering this card into the following challenges: 

Supplies used to create this card:
  •  Core'dinations 65lb paper (Joann's)
  • Colorbox designer paper pad 6x6" (Walmart)
  • Fiskars Latte Love stamp set
  • Embellishments
  • Small butterfly paper punch
  • Gold Stickles
  • Foam tape from Orientaltrading.com


Tuesday, March 3, 2015

Spring Coffee Lovers Bloghop!

Print 
 Spring Blog Hop!  
Remember, the theme is Spring!  Your projects must be newly created and PLEASE, no back linking.  
The hop will run from Friday, February 27th – Friday, March 6th.
Visit Coffee Lovers Cardmakers for more details or click the image above.  

Here is my creation to share in the blog hop:


I used white embossing powder stamped on the background and watercolored pastel colors over the top after heat setting the powder.  I did not use watercolor paper (and really should have!!) so now I know for next time! I had pigment ink squares in pastel colors that matched the watercolors I used (yay!) and just love how it turned out!  The quote is adhered with foam tape and small blue half pearls to finish it off.  Enjoy this inspiration and keep the creativity flowing!

This card has been entered into the following challenges: -Spring Coffee Lovers Bloghop - 3/8
2015 World Wide Open DT Challenge - (3E Max, this is #2) March - 4/4 
-Loves Rubber Stamps Challenge - Anything goes - 3/10 
-Through the Craft Room Door - March (1 of 2E)  3/11
Party Time Tuesdays - #196  4/7 (1 of 3E)

  Craft supplies used include:
  • Core'dinations 65lb cardstock from Joann's
  • pigment ink squares from Tuesday Morning
  • Fiskars latte love stamp set
  • Coffee quote stamp by Stampendous
  • Simply Art watercolors from Joann's
  • WOW white embossing powder
  • Blue pearl embellishments from Orientaltrading.com

Monday, March 2, 2015

Snappy Birthday Card with Melonheadz Digis

The current challenge at Melonheadz Friends is:  Use Green Challenge!  Spring is on it's way (eventually...) and I loved coloring these critters. I used watercolor pencils and some Patina Stickles on the turtle.


 The background is a leaf wood-block stamp from an old Stampin' Up set I purchased online on Ebay.  I check Ebay often for stamp sets because you can find real treasures up for auction there! The cute embellishments were a gift.  The sentiments are from a My Pink Stamper "Punnylicious" set, plus I have many more cute sayings you will see on future cards! Hope this provided some inspiration. Keep the creativity flowing!

 This card will be entered into these challenges:  -Simon Says Stamp Wednesday Challenge-Anything goes! 3/4  -Artistic Inspirations - Ch #126 - 3/16
Card Mania Challenge #66 - March
-Crafting from the Heart - #49 - 3/9
-Craft Your Passion - #251 - 3/9
Live Laugh Stamp My Creative Moments - No. 4 - 3/22
-The Crazy Challenge - #192 - 3/15
Great Impressions - March -  4/5
-One Stitch at a Time - #231 - 3/8
-Robyn's Fetish Challenge - #253 - 3/8
-Simon Says Stamp Monday Challenge - Hint of Clover 3/9

2015 World Wide Open DT Challenge - (3E Max, this is #1) March - 4/4

Items used include:
  • Melonheadz Cassie's Pond Digi Bundle
  • My Pink Stamper Punnylicious stamp set
  • Stampin' Up leaf stamp
  • Sargent's Watercolor Pencils
  • Patina Stickles
  • embellishments
  • Core'dinations 65lb cardstock from Joann's
  • Staz On Jet Black ink
  • Blue-green pigment ink square from Tuesday Morning